Create Lists of Inductions or Hemorrhages
We've made some updates to the Find/Print Patients and Find/Print Births pages to provide more options to customize lists based on variables.
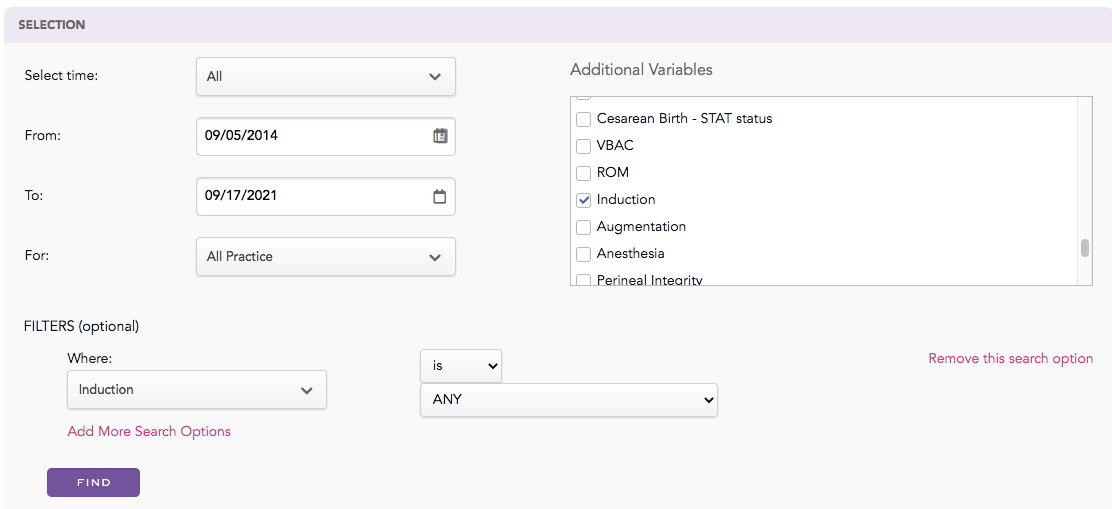
Now when you choose a filter you have the option to choose is ANY. This will only show you patients where any selection was chosen for this field. This is great for fields like induction and augmentation where you are only choosing a dropdown option if it applies.
You can also use this option for custom fields. For example you could create a field titled Hypertensive Disorders with a dropdown of the different types, i.e. GHTN, PEC, CHTN, etc. Now you can filter by this field so you can create a list of patients with a hypertensive disorder. See example below of how to fill out the Find/Print Births page for a list of your inductions.
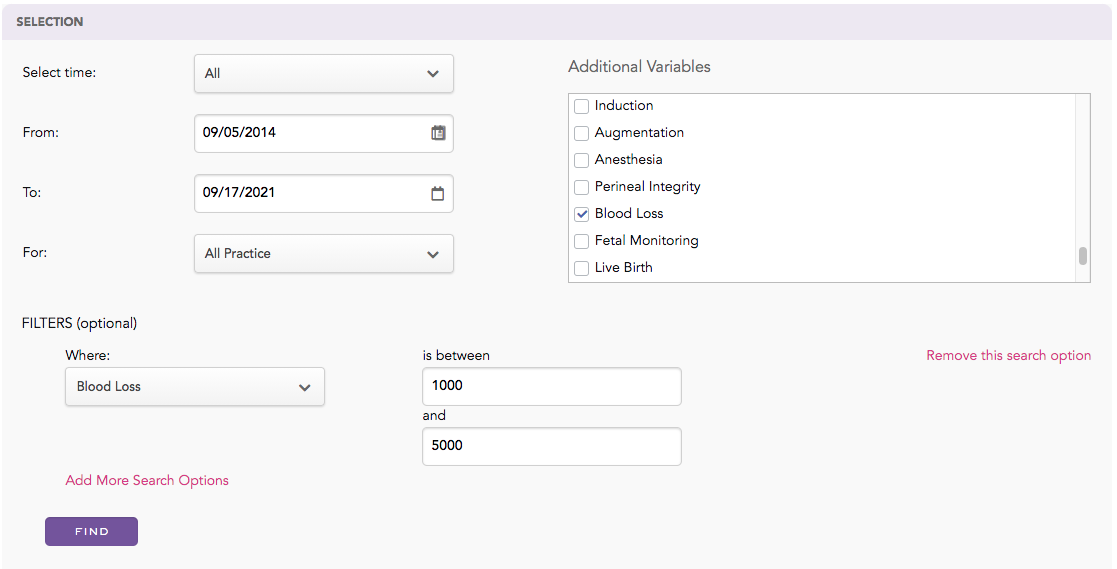
We've also changed the Blood Loss filter to a range. See below of how to create a list of hemorrhages on the Find/Print Births page.
If you need assistance with creating custom lists, adding custom fields, or any other features, please contact us at support@birthtracks.com. We would be happy to provide a zoom tutorial and discuss your needs.
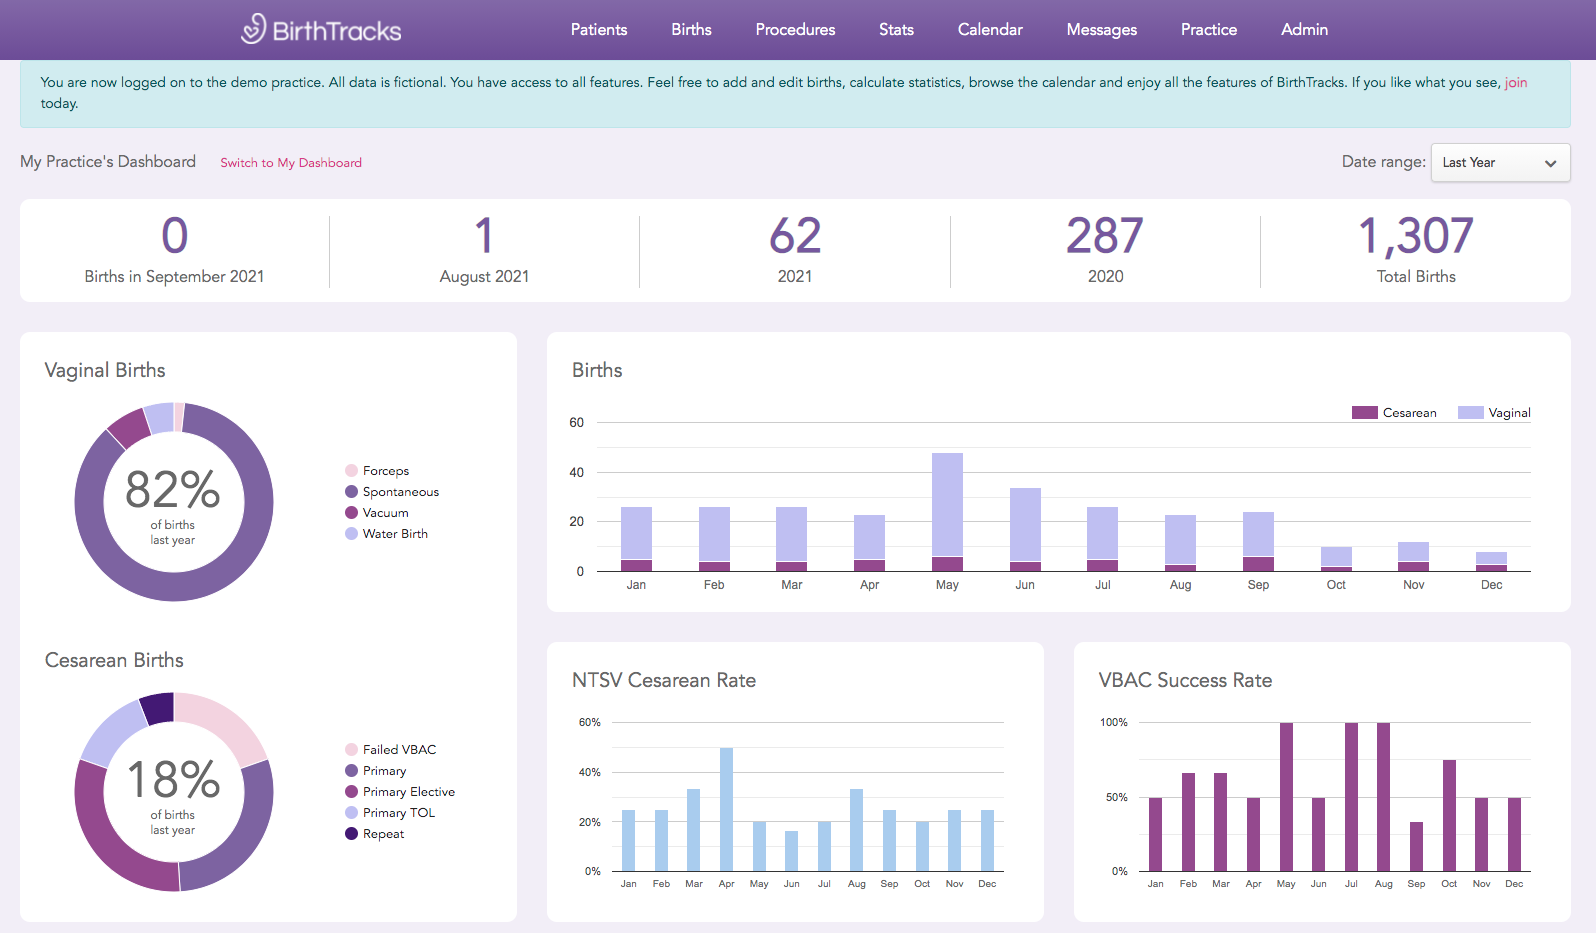
Practice Dashboard
We have added a dashboard to the BirthTracks homepage so you can visualize the most important statistics and graphs for you or your practice all in one place. View your birth count, monitor your complication rates, and analyze trends in patient outcomes. You can change views between your data or your practice's data and modify the date range that applies to the graphs. Hover over the graphs to see more detailed information.
Patient Status Board
We are excited to announce that we have added a patient status board to BirthTracks which you can find under Patients > All Patients!
This will allow you to view and print a list of all of your patients and relevant critical information. You can filter your patient list by inpatient status, outpatient status, prenatal site, birth site, or provider. You can easily customize the information displayed and update the list with comments and changes in status.
You can use your list for patient tracking, rounding, discharge management, and provider handoff.
Please watch this quick video (3min) to learn how the new feature works:

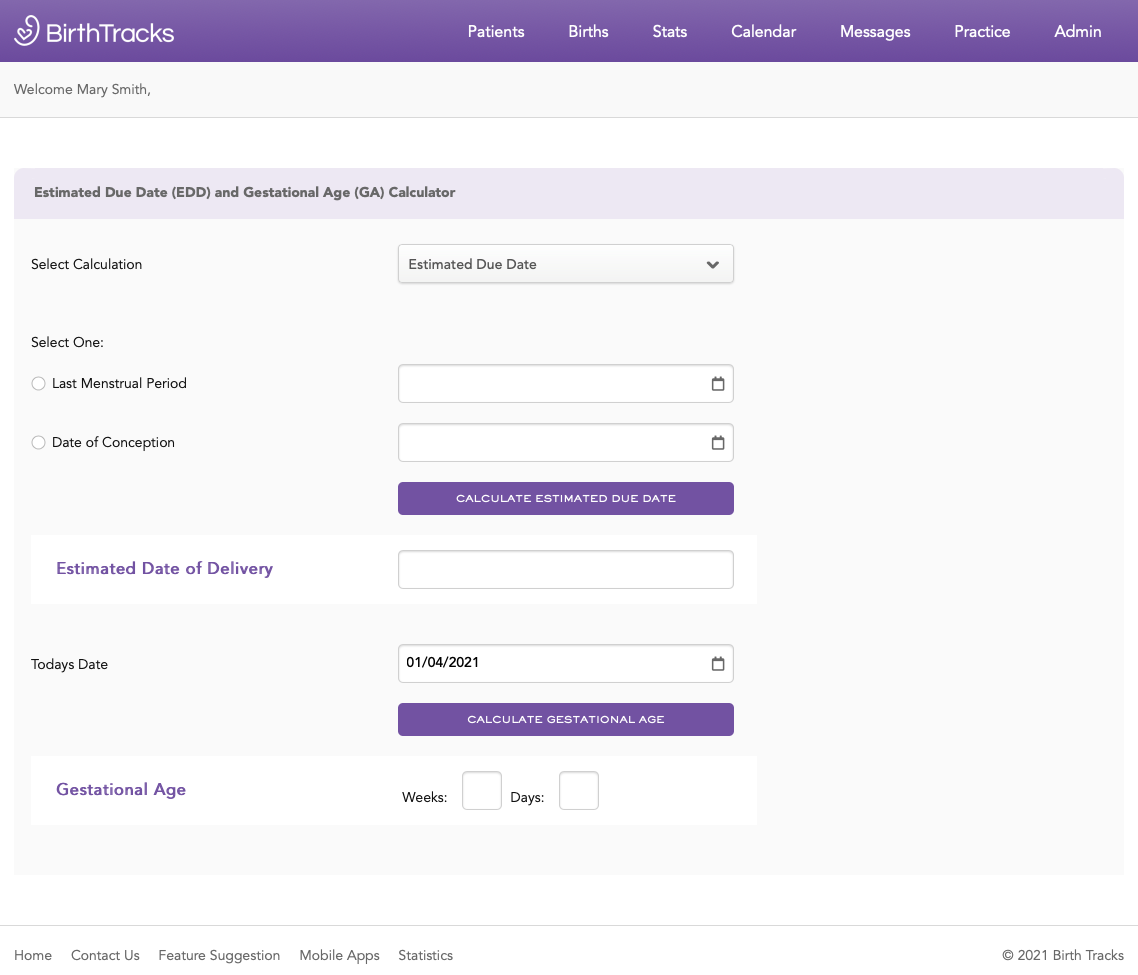
EDD Calculator
For your convenience, we've added a due date calculator to two sections of the site. The first allows you to calculate the due date from LMP or date of conception when adding a new patient:

The second feature, listed under the Patients tab, allows you to calculate Due Date, Gestational Age, or Target Date for Gestational Age.
Transfers/AB
We have added the ability to track Transfers/AB.
In Mothers or Birth view, Antepartum Transfer has been changed to Left Practice and you have the option to select a number of relevant options.
This mother is now taken out of your mother and birth list and put in a new category (Mothers-Transfers/AB)
NOTE: If you previously selected yes for antepartum transfer, it has been changed to "Other". You can change them all individually, or contacting BirthTracks to change them all (if you have many). We are sorry for the inconvenience.
Also if you do not see a mother - if she previously had antepartum tranfer as yes, that mother is in Mothers-Transfers/AB
Count Births for you and your practice
Now each birth will be numbered chronologically. Each birth will have 2 numbers - one tracking for the midwife delivering the baby and also the practice. This will allow you to know at all times how many births you have done and also allow you to
easier keep a tracking number with each birth.
The number will appear automatically when you view the birth.
To see statistics based on this value:
- Click Stats - Tabular Data - Birth Count
If you would like to change your starting number (ie if you delivered 322 births before birthtracks, you would want to start on number 323:
- For midwife - Click Settings - User Settings - Personal Info
- Or for the practice - Click Practice- Practice Settings- Practice Info
Backup Your Data Easily
Your data is secure but it is a good idea from time to time to keep a backup for your records. BirthTracks makes it easy to quickly backup your data into Microsoft Excel.
To backup your data:
- Click Settings - Data - Backup
The data will download as a CSV file on your computer.
You can then use excel to modify and graph the data. Remember to save the excel data to your "my documents" folder.
Find Births or Mothers
It is now very easy to find
births or mothers using any criteria using BirthTracks.
To find a Birth:
- Click Births - Find Birth
To find a Mother:
- Click Mother - Find Mother
The Find Births page will open. You can select as many criteria as you want. (To add more options click on the right - add more search options)
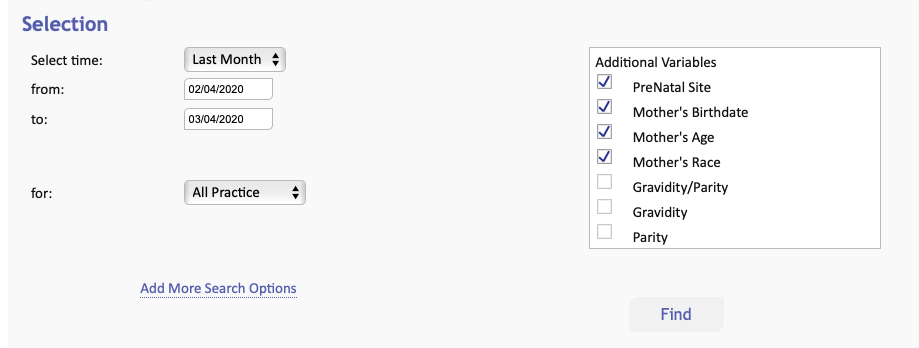
When you click find, all births meeting those criteria will be returned. You can select any of those births to see the full information.
Add Users the Easy Way - ADMINISTRATORS ONLY
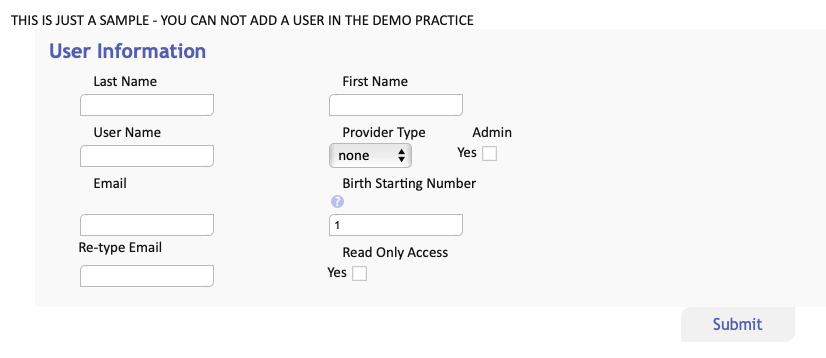
Administrators have 2 ways to add users to their practice. One way is to click Users-Add Users and fill in the information. The easy way is to give everyone in your practice the Add User Code and all them to add themselves.
To set the addUserCode:
- Click Practice - Practice Information
- Modify the add user code to your preference.
Give users:
- Add User Code
- Practice PassCode
Tell users to go to BirthTracks.com and have them fill out the registration information themselves (click Register-Register with a practice).
Keep Track of Additional Fields
Do you want to keep track of additional fields that are not normal BirthTracks variable? It is easy using additional fields. Your new fields are searchable and graphable.
To add fields: (ADMINISTRATORS ONLY CAN ADD FIELDS)
- Click Practices - Additional Fields
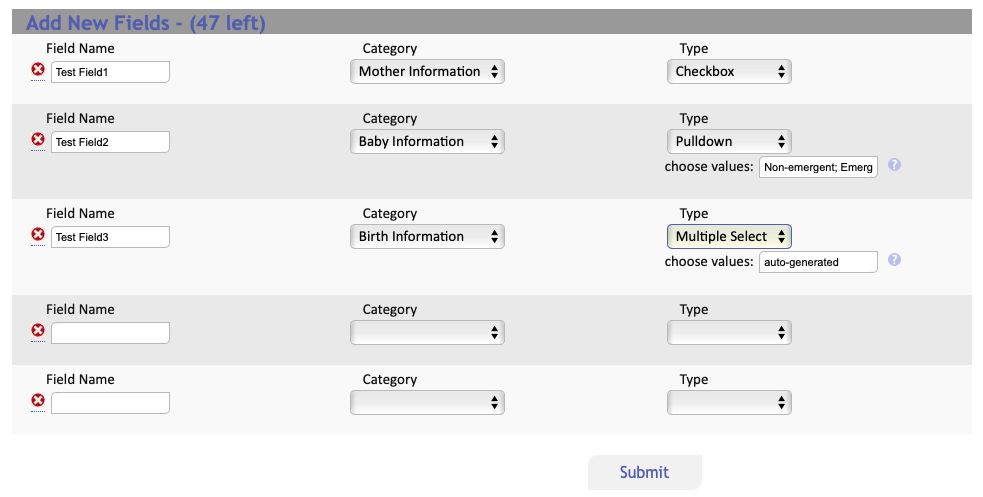
After adding fields, they will show up when you add, print
Give Users Read Only Access- ADMINISTRATORS ONLY
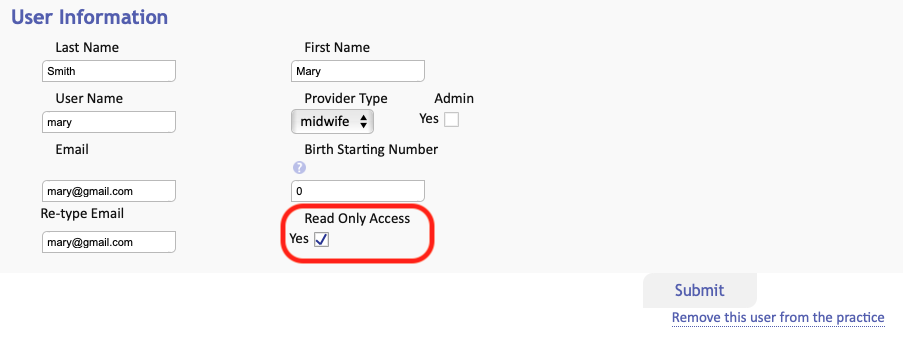
Administrators can add users so that they only have access to view data (not add, edit, or delete data).
To add a user with read only access:
- Click Practices - Add Users
- Check the box for read only access
The user will receive an email with their username and passcode. They will need you to give them the practice passcode.